1 React前端工程架构 - 基本配置
Tue, Sep 18, 2018
0x0 概述
上一篇文章我们聊过,工程架构的目标,主要是保证「开发效率」的。包括:
- 解放生产力
- 环境搭建
- 质量保障
本篇文章,将会就React的实际配置做下做下初步说明
内容包括:
- npm、webpack、babel编译打包基础配置
- SSR(服务端渲染)基础配置
- dev server实现代码实时编译
- hot module实现代码热更新
- 服务端渲染的实时更新
- eslint保证代码质量
0x1 编译打包基础配置
webpack
webpack是一个模块打包器,核心是他的loader
- 通过loader处理某种类型的资源(js、css)
- 会把资源处理成浏览器能运行的代码(es5),浏览器里能完整使用
- 如果木有对应类型的loader,可以自己写一个
- 如vue自己写了一个loader处理它定义的特殊语法
I 基础配置阶段
1.在项目根目录下,把项目配置成npm的项目 - 通过生成的package.json文件描述依赖的npm包
$ npm init |
相关选项 - 一般情况下直接enter用默认值就好
{
  "name": "fe-execise",
  "version": "1.0.0",
  "description": "",
  "main": "index.js",
  "scripts": {
    "test": "echo \"Error: no test specified\" && exit 1"
  },
  "repository": {
    "type": "git",
    "url": "git@gitee.com:azen/FE-execise.git"
  },
  "author": "Azen",
  "license": "ISC"
} |
2.安装webpack、react
$ npm i webpack $ npm i react |
3.新建文件夹 & 初始文件
- build文件夹:放配置文件以及工程中需要用到的脚本文件
- webpack.config.js
- client文件夹:放前端app
- app.js:应用入口
- 里面引用了App.jsx,然后把它mount到html中
- App.jsx:声明整个页面上面的内容
- app.js:应用入口
webpack.config.js
const path = require('path');

module.exports = {
    //  入口
    entry: {
        app: path.join(__dirname, '../client/app.js')
    },
    output: {
        filename: '[name].[hash].js',
        path: path.join(__dirname, '../dist'),
        publicPath: "public/"
    }
}; |
path包:把相对路径转成绝对路径,防止跨操作系统时路径出错 - entry - 告诉webpack打包入口文件是app
output:
- filename: 指定输出的文件名
- 简单的可以写死app.js这个名字
- 一般这样写
- []里面放变量:
- name表示entry中对应的名字,这里是app
- hash是打包完后,对内容做的hash
- 一旦树目录下任何一个文件变动,hash会变
- 会更新浏览器缓存
- []里面放变量:
- path:打包好的输出路径 - /dist文件夹下
- publicPath:指定静态资源文件引用时的路径
- 用途:用于区分url对应的请求目标,是静态资源还是api请求之类的
- 配置nginx的时候更方便区分(有public的就把静态资源丢过去,没的就丢给api服务器)
- 用途二:部署到cdn上的话,publicPath写cdn的域名即可
- 后续还会看到它的效果
- 用途:用于区分url对应的请求目标,是静态资源还是api请求之类的
package.json
{
  "name": "fe-execise",
  "version": "1.0.0",
  "description": "",
  "main": "index.js",
  "scripts": {
    "test": "echo \"Error: no test specified\" && exit 1",
    "build": "webpack --config build/webpack.config.js"
  },
  "repository": {
    "type": "git",
    "url": "git@gitee.com:azen/FE-execise.git"
  },
  "author": "Azen",
  "license": "ISC",
  "dependencies": {
    "react": "^16.5.1",
    "webpack": "^4.19.0"
  },
  "devDependencies": {
    "webpack-cli": "^3.1.0"
  }
} |
scrpits:
- 定义build命令
- --config:webpack指令的参数,用于指定config文件
简单测试
$ npm run build |
结果:
- 生成dist/app.xxxxhashxxxx.js文件,就是打包好的文件了
- 生成的js文件:
- 前面部分是webpack处理模块时加的东东,不用管它
- 底部会是我们自己写的相关逻辑
II 简单业务文件 & 入口文件实现
App.jsx
import React from 'react'

export default class App extends React.Component {
    render() {
        return (
            <div>初次见面,请多关照~(๑^ں^๑)</div>
        )
    }
} |
app.js
$ npm i react-dom -S |
- -S:save,生产环境依赖
- -D:save-dev,开发环境依赖
import ReactDOM from 'react-dom' import App from './App.jsx' import React from "react"; ReactDOM.render(<App />, document.body); |
配置:
- react-dom是用来把react的组件渲染到dom上用的
- 和它对应的,react-native是把组件渲染到手机端
- import App.jsx:
- 目前没配webpack忽略后缀名,所以需要写jsx后缀名
- import React:
- 这里一定要引React的原因:
- 每一个jsx的标签(<App />),本质都是把标签内容作为参数,传给react库中的create_element方法,进而生成真正标签
- 这里一定要引React的原因:
webpack.config.js
需要给webpack配置,让它能识别react相关语法 - jsx文件和一些我们自定义的js文件中会用到react语法
module.exports = {
    ...
    module: {
        rules: [
            {
                test: /.(jsx|js)$/,
                loader: 'babel-loader',
                exclude: [
                    path.join(__dirname, '../node_modules')
                ]
            }
        ]
    },
}; |
配置:
- rules数组:里面配很多loader
- test:告诉它哪种类型的文件需要编译 - 以.jsx或.js作为结尾的文件
- loader:指定使用「babel-loader」作为loader
- exclude:需要排除的文件 - node_modules文件夹下的所有文件 - 这些都是三方库文件,本身已经被编译过了
$ npm i babel-loader@7 babel-core -D |
babel
是一个能编译各种js语法的工具,编译出来的是浏览器里默认能执行的es5语法
- babel能支持jsx、es7、ts等等
- 以前的编译器complier是react官方自己做的编译工具,现在直接用babel就好
bable-loader:是一个webpack插件,不包含babel的核心代码,需要再安装下「babel-core」
因为依赖版本问题,这里需要指定下babel-loader@7
babel默认只能编译es6的代码,不能编译jsx,需要在根目录写下配置文件`.babelrc`
{
  "presets": [
    ["es2015", {"loose": true}],
    "react"
  ]
} |
配置:
- presets:配置支持的语法
- babel默认把所有语法拆分出去了,babel core没包含语法相关引擎
- es2015(就是es6),loose true是指松散型的语法
- react
安装babel语法引擎
npm i babel-preset-es2015 babel-preset-es2015-loose babel-preset-react -D |
简单测试
npm run build |
结果:
- 编译出来一个非常大的文件,里面包含了所有react源代码
浏览器展示
希望在浏览器中展示js效果,需要安装html-webpack-plugin
作用:
- 生成一个html入口页面
- 在webpack编译的时候,所有entry都注入到这个html入口页面中(在html中做引用)
- 路径会根据我们webpack配置的publicPath拼接而成的
安装:
$ npm i html-webpack-plugin -D |
修改配置文件,把插件配置给webpack
const HTMLPlugin = require('html-webpack-plugin');

module.exports = {
    ...
    plugins: [
        new HTMLPlugin()
    ]
}; |
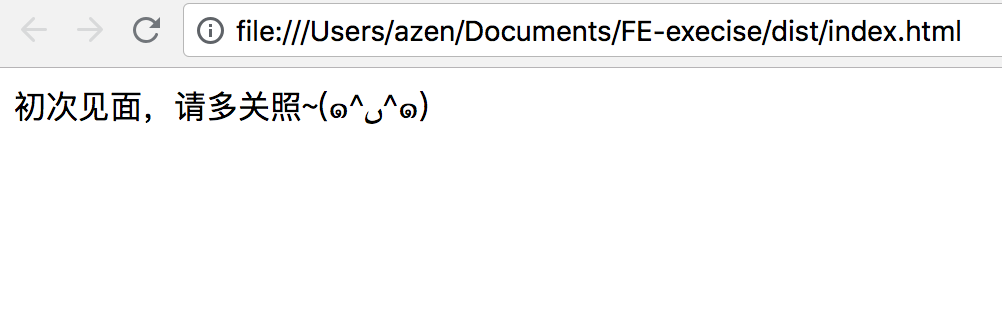
效果:
- 在生成的入口html中注入了打包好的js文件引用 - 且拼接了publicPath配置中的前缀
- 因为没起任何服务,也没做路径映射,直接打开这个html是无法访问到我们的js文件的(因为真实文件路径中,dist目录下,js文件和入口html文件同级,真实目录中没有「public/」这一层)
- 为了展示效果,可以暂时注释掉publicPath配置
最终结果
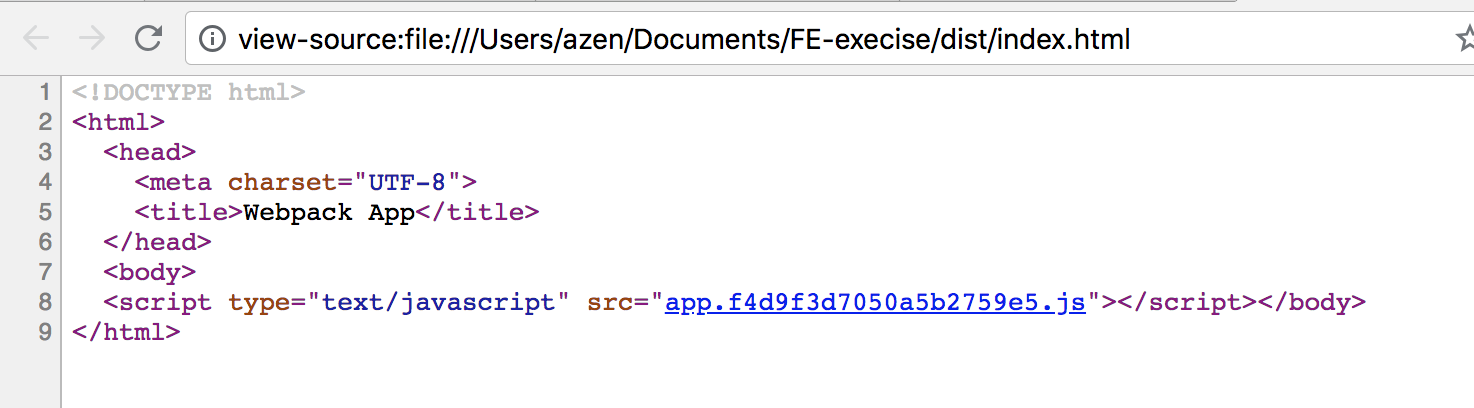
我们看到,源代码里只有一句js引用,木有我们场景的<a><p>等标签,这样对SEO不利 - 蜘蛛认为我们的网站中木有内容
下一节解决这个问题
0x2 服务端渲染基础配置
0 概述
webapp开发模式下,都是在浏览器端使用js实时渲染出来内容的
问题:
- SEO不友好
- 根据url请求到的html是空白页面
- 蜘蛛会认为网站没东西
- 首次加载时间长,体验不好
解决思路:
服务端渲染:在服务端的nodejs环境下,提前做好渲染,得到要访问页面的html内容,返回给浏览器
可用工具:
- react-dom解决方案
- 客户端使用react-dom在浏览器中做页面渲染
- 服务端使用react-dom下面的server模块,在服务端做渲染
I 代码调整阶段
之前app.js文件中,我们直接把App直接mount到document.body
问题:服务端运行环境中木有document,这个东东只有浏览器端有
解法:定义server-entry.js文件作为服务端渲染入口文件
import App from './App.jsx' import React from "react" export default <App /> |
- 也需要打包和编译
- 因为jsx不能直接在nodejs环境下执行
配置:新建一个webpack配置文件,用来做服务端编译配置
build/webpack.config.server.js
const path = require('path');

module.exports = {
    target: 'node',
    entry: {
        app: path.join(__dirname, '../client/server-entry.js')
    },
    output: {
        filename: 'server-entry.js',
        path: path.join(__dirname, '../dist'),
        publicPath: '',
        libraryTarget: 'commonjs2'
    },
    module: {
        rules: [
            {
                test: /.(jsx|js)$/,
                loader: 'babel-loader',
                exclude: [
                    path.join(__dirname, '../node_modules')
                ]
            }
        ]
    }
}; |
说明:
- target:配置打包出来的内容在什么环境中执行的
- web(浏览器端)
- node(nodejs环境,服务端渲染)
- filenam:服务端没有缓存概念,不需要hash,写死就好
- libraryTarget:打包出来的js使用的模块方案(module)
- 指定为commonjs2(还有umd amd啥的...)
- 使用commonjs2的模块加载方案,适用于nodejs端
- plugin:这个不需要,不用生成一个html文件
构建
先安装一个删除文件夹的小工具
$ npm i rimraf -D |
定义构建方法:
package.json
{
  ...
  "scripts": {
    "test": "echo \"Error: no test specified\" && exit 1",
    "clear": "rimraf dist",
    "build:client": "webpack --config build/webpack.config.client.js",
    "build:server": "webpack --config build/webpack.config.server.js",
    "build": "npm run clear && npm run build:client && npm run build:server"
  },
  ...
} |
在build之前,先把dist包清空下,删掉历史打的js包,避免编译结果污染
构建结果
生成了三个文件
服务端打包出来的server-entry.js文件,可以用来放在node.js环境中做渲染,生成对应的html文件
简略看下打包出来的server-entry.js文件
module.exports=function(e){...xxxxxx...} |
II 配置渲染服务器,构建nodejs渲染环境
需要起一个nodejs网络服务,使用express作为网络服务框架
$ npm i express -S |
实现渲染服务器
创建server文件夹,放web服务相关代码
实现server.js文件,用来实现web服务相关逻辑
const express = require('express');
const ReactSSR = require('react-dom/server');
const serverEntry = require('../dist/server-entry.js').default;

const app = express();

app.get('*', function (req, res) {
    const appString = ReactSSR.renderToString(serverEntry);
    res.send(appString)
});

app.listen(2333, function () {
   console.log('🚀 服务起来了,正在监听2333端口(✌゚∀゚)☞')
}); |
- 需要引用过来react-dom/server这个包,用来做html服务端渲染
- 任何请求过来,都用SSR渲染之前用webpack build好的待渲染server-entry.js文件,返还给请求者
- 由于/dist/server-entry.js使用commonjs2的方式编译,导出方法为modules.exports=xxx,故nodejs中require的时候,需要追加.default,否则会报错
npm中配置起这个服务的script
{
    ...
  "scripts": {
    ...
    "web:start": "node server/server.js"
  }
    ...
} |
渲染内容不完整
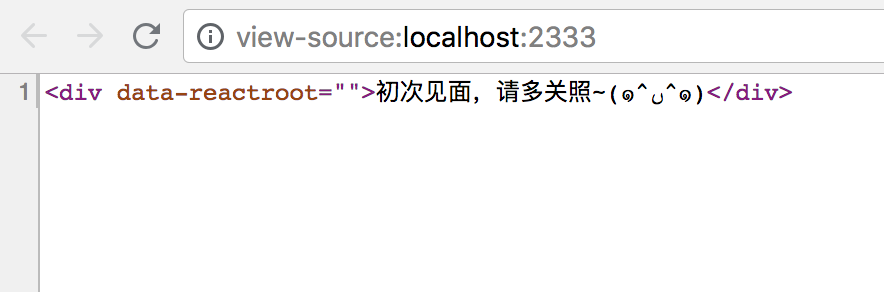
问题
虽然渲染出了基础的内容 ,但是这个不是我们想要的完整内容:
- 没有这个页面的js文件引用
- 不是完整的html文件,只有一行语句
思路
把服务端渲染出来的html标签内容,拼接到编译打包好的客户端index.html文件的指定位置,然后把拼接后的内容返回给浏览器
方案
- 在client文件夹下写个模板文件template.html
- 渲染的时候,把模板文件中的占位文本(如<>)替换成服务端渲染出来的东东
template.html
<!DOCTYPE html>
<html>
<head>
    <meta charset="UTF-8">
    <title>Webpack App</title>
</head>
<body>
<div id="root">
    <app></app>
</div>
</body>
</html> |
app.js
...
ReactDOM.render(<App />, document.getElementById("root")); |
webpack.config.client.js
...
plugins: [
    new HTMLPlugin({
         template: path.join(__dirname, '../client/template.html')
    })
] |
server.js
...
const fs = require('fs');
const path = require('path');
const template = fs.readFileSync(path.join(__dirname, '../dist/index.html'), 'utf-8');
...
app.use('/public', express.static(path.join(__dirname, '../dist')));
app.get('*', function (req, res) {
    const appString = ReactSSR.renderToString(serverEntry);
    res.send(template.replace('<app></app>', appString))
});
... |
说明:
- 需要把index.html读进来,注意指定读取的文本格式为utf8
- 需要注意,这里要读的,是dist/index.html,是编译好的html入口文件,而非直接读client/template.html
- app.use句:
- 配置url中/public下的内容,为访问静态资源
- 挂载静态资源访问请求,到../dist目录下
- 目的是为了防止静态资源获取类请求(xxx.js的请求),也被app.get相关规则限制住
- 需要在webpack配置文件中指定publicPath为/public,与这里一致
- 把模板中的占位标签替换掉
webpack.config.xxx.js
...
output: {
    ...
    publicPath: '/public'
},
... |
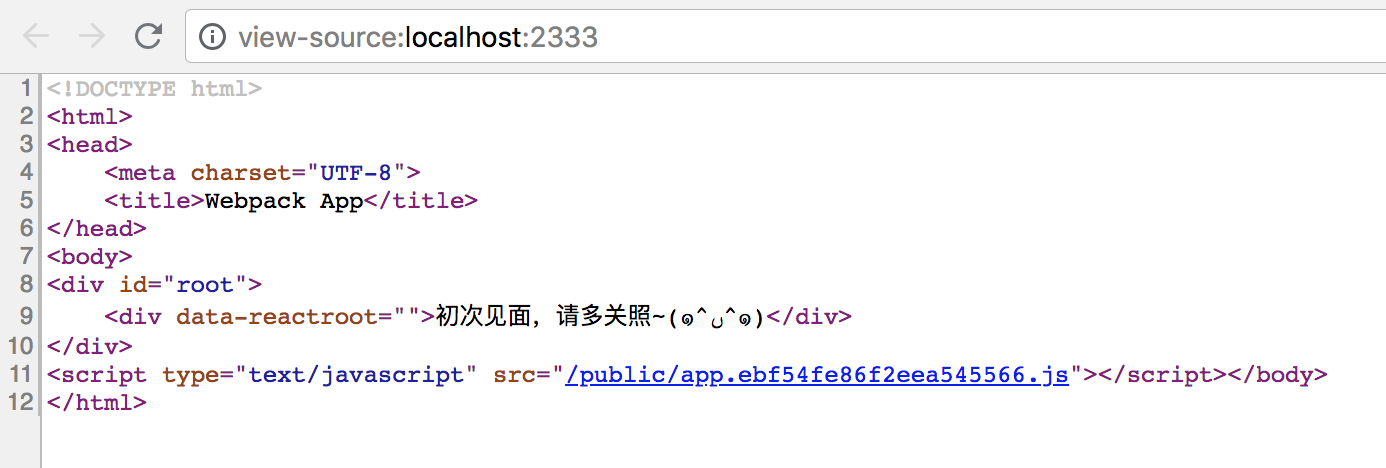
配置结果
III 问题
- 每次修改了client目录下的代码,都需要重新build一遍才能生效
- 每次修改了web server的代码,都需要重新web:run一遍才能成功
下一章,我们来实现「开发时代码的实时更新」